
Chaos Critters Tech Support 1
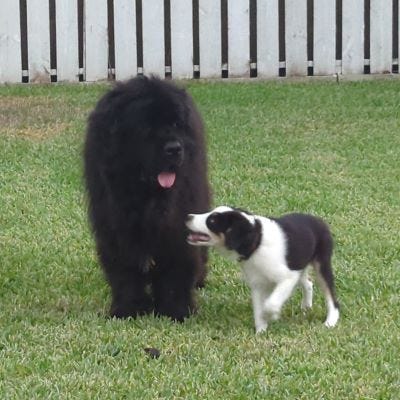
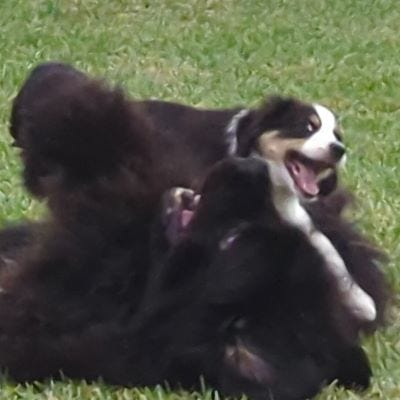
This week we have pictures of Crokell and Dante playing with each other and a video of Crokell in competition. We end with a tip of the week and a small writing update.

Hi, Tod here today, it has been another crazy week of chaos and minions. Anna has been doing more dog training at home with both Dante and Crokell. Writing has taken a little bit of a back seat for her, as Anna decided to drop kick her laptop across the garage last week. (Hey, it just slide off the car when I put it there while was getting… something…)
So, we were investigating shock resistant small laptops Pro, tip there aren’t many that aren’t hefty and Anna resistant laptops are impossible to find. Therefore, I have taken control of the blog for a few weeks - BWAHAHA - while we wait for Anna’s new laptop to ship. The current screen is pretty much shattered and while she is sort of able work on it is… awkward for her.
This week’s question: what’s the worst thing you’ve ever done to your computer?
Adobe for Videos
We now recommend Adobe for videos and editing. There’s some detail here ( https://blog.casasent.blog/p/sunday-salutations-and-embracing-adobe ). But the online Adobe Express for video covers most of our needs, with Premiere Pro and Premiere Elements on the local computer.
Crokell’s Beginner Novice Run!
Tip of the Week
When dealing with a superior foe, never give up. You might end up on top.
When dealing with a much smaller playmate, be willing to lay down and play on their level. It’s a lot more fun.
Writing Notes
I’ve got two chapters left in the “very light” first draft of the Nano-Sapiens novel. Then Anna takes each chapter and doubles or triples its length. And then we have a novel after I edit it.
Ow. Sorry to hear about the laptop casualty. I once made the mistake of using an Apple laptop connected to an external monitor, keyboard and mouse while I kept the laptop closed. Those metal shell laptops trapped a ton of heat, which caused it to overheat and crash. Always, always, always check what a so-called internet expert says. 🤦♂️
Anyway, loved the photos of the pups and the lessons on video processing. 👏
Aw, they are playing good together!
Thanks for the run down on CapCut.